

Friday, April 21, 2023
Collage: Cash Box Kings

Thursday, March 30, 2023
Spotlight: Revere Stereo 33


The Revere Stereo 33 takes 35mm film. Unlike some stereo cameras that I've used, the loading process is quick, and just as simple as with any normal 35mm camera. On a standard 24-exposure roll, you get about 16 stereo pairs (32 individual negatives). On my Orlando trip I got greedy, and tried to expose an extra few frames on one of my rolls. As a result I successfully ripped the film out of the cassette and had to take it it out of the camera back home in my darkroom (luckily it was the final roll of the trip). The frame counter does not reset automatically, and must be manually turned back to zero at the beginning of each roll. Oddly, the frame counter also doubles as the camera's rewind release. Once your roll is finished, you must turn the frame counter to "R," which disengages the advance sprocket and allows you to rewind the film. Weird!
Focusing is achieved via a knob on the top plate of the camera. Like many stereo cameras, the film plane moves instead of the lenses while focusing to keep everything in alignment. There are two windows on the back of the camera: one for focusing via a rangefinder patch, and one for composing the image. The focusing knob is positioned so it can be easily turned with your right thumb while your eye is to the rangefinder window. It can feel awkward at first, switching between the focusing and composing windows, but with some practice the process becomes second nature. If it's a bright day out you can shoot at f/16 and just scale focus (there's an awesome depth of field scale around the focusing knob).
 |
| The left window is for focusing, while the right is for composing |
The matched 35mm lenses provide a slightly wide field of view, and are pretty sharp! Apertures range from f/3.5 to f/22. Each lens has a leaf shutter, with speeds ranging from 1/2 to 1/200. 1/200 doesn't sound like much, but it's par for the course when it comes to stereo cameras. Most of the time you'll want as much depth of field as possible for your 3-D photos, so faster speeds aren't really necessary. Exposures with my particular camera aren't 100% matched (one negative always seems a little thinner than the other), but this is understandable for a 70-year-old camera, and it's easy enough to correct these slight differences in post. One extra feature that I love is the camera's ability to perform multiple exposures with a simple flick of a switch beneath the lenses. Multiple exposures in 3-D can look pretty trippy!
Unfortunately, the Revere Stereo 33 does not have a standard hot shoe, nor does it have a sync port for attaching a flash. My workaround is with a Vivitar 283 flash, which sets its flash output automatically based on your camera's aperture setting. I match the output level on the flash with the aperture setting on the camera (usually f/16 so not too much ambient light gets in), start a bulb exposure, fire the flash manually using the test button on the back, then finish the bulb exposure. It's a pain for sure, but it works.
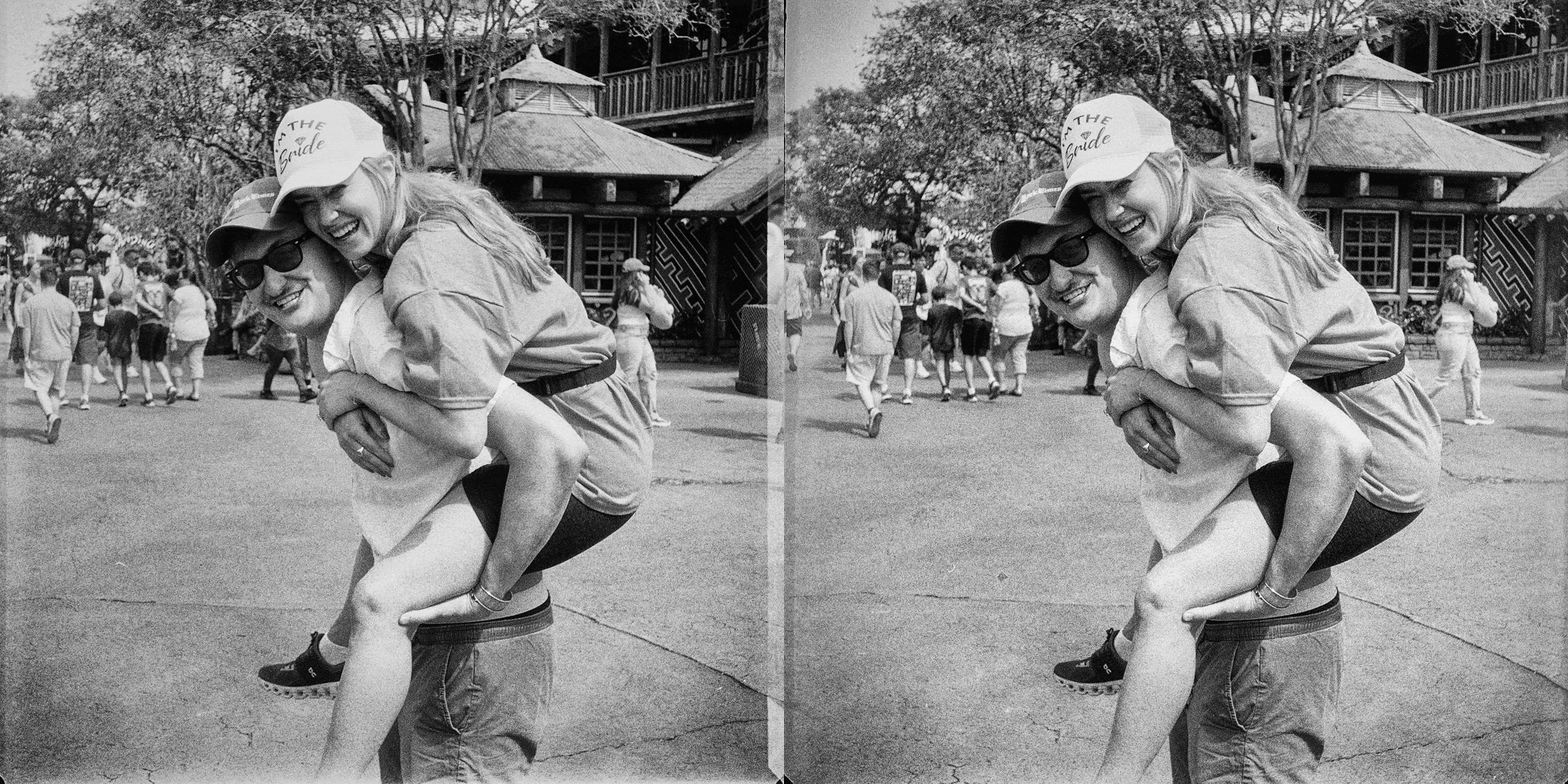
But yeah, overall I love the Revere Stereo 33. I've yet to find a 35mm stereo camera that is easier to use, or one that has more precise focusing. I plan on doing a lot more stereo work with this camera over the summer. Below are some stereo pairs that I made documenting my brother's big bachelor weekend. Unfortunately it's very difficult to see the 3-D effect without a viewer, but if you stare past the center of the pair, you can sometimes trick your eyes into seeing a 3-D image. It's also somewhat effective if you flip rapidly between the left and right eye images using a GIF, but in my experience, this doesn't work with every stereo image. The film was bulk-loaded Ilford HP5+.




Thursday, December 15, 2022
Spotlight: Fujifilm GW690III Professional

A few weeks ago I was in Galesburg, Illinois for an art opening, where my friend Tom was kind enough to lend me his newly purchased Fujifilm GW690III Professional camera for a day. Released in 1992, the GW690III is the third and final 6x9 medium format rangefinder camera that Fujifilm produced in the GW line. It's completely mechanical, and doesn't even have a light meter, not that a Professional (a la the camera's moniker) would require a light meter, anyways. I don't understand why Fujifilm included the Professional subtitle under so many of their cameras. It's honestly a bit cringe -- like they're pleading with professional prhotographers to buy their cameras.
Anyway, the GW690III is a complete beast of a rangefinder. I mean, as one might expect from a camera that produces a 6x9 negative, the thing is frickin' huge. That said, though, it isn't too heavy (I think it's made from some high-quality plastic), and it's not really a pain to carry around if you have a decent strap or bag. I took Tom's camera around with me to a few different bars and barely noticed it slung around my shoulder. The grip on the camera is comfy, and there are even two different shutter releases-- one on the top of the camera, and one on the front. Not really sure why the extra release is necessary, but it's pretty cool!
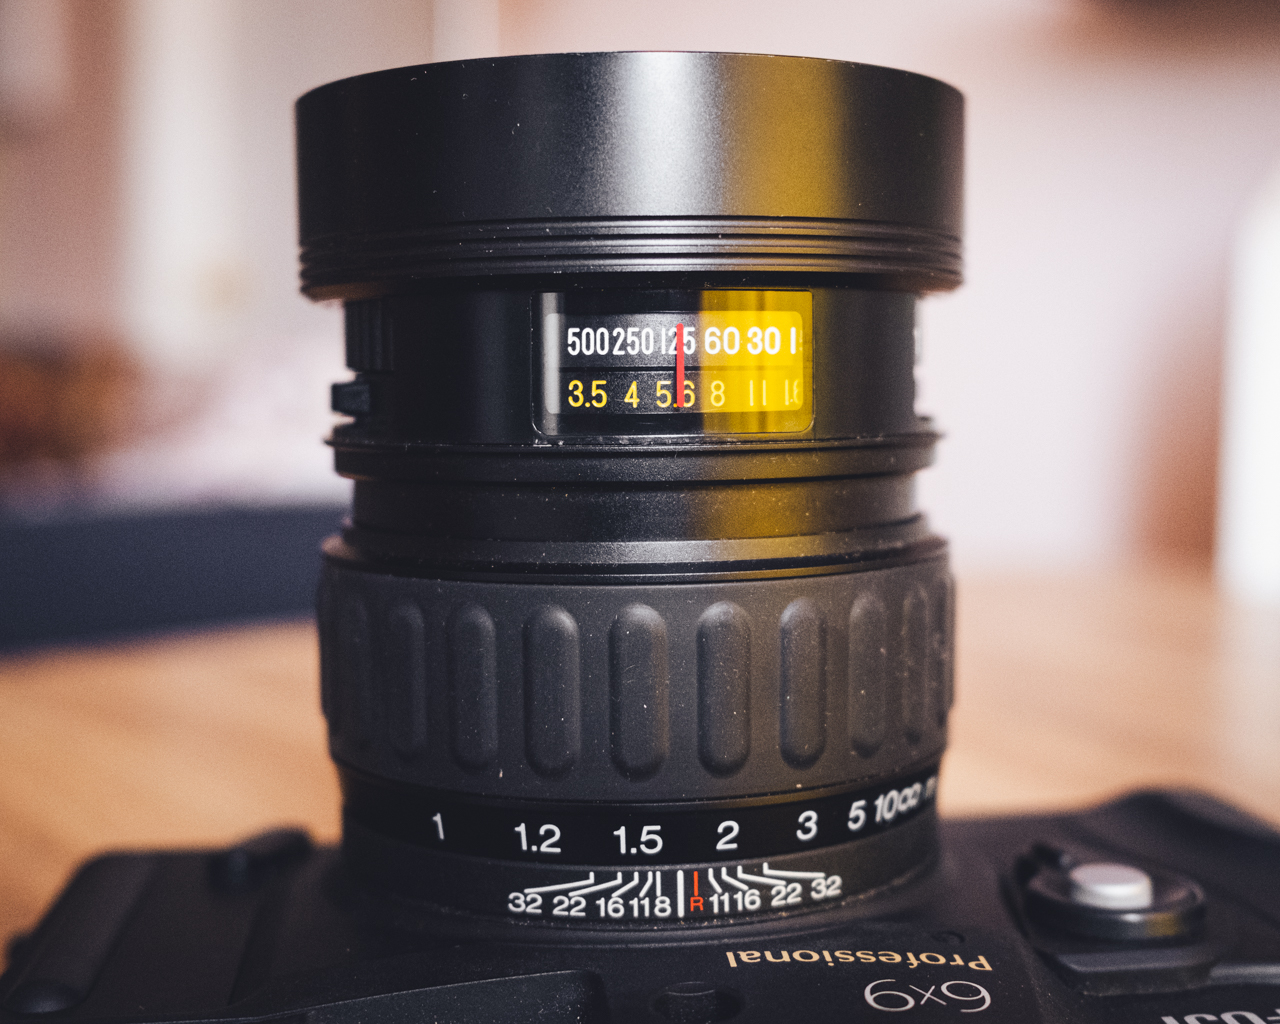
Aperture and shutter speed are both controlled via two dials around the tip of the lens, and are easily adjustable with your left hand. Unlike some dumb German and Swedish cameras, the shutter speeds and apertures thankfully don't interlock. The lens is a fixed 90mm f/3.5 lens, which with the 6x9 format, provides roughly a 40mm field of view in 35mm terms. It's a great angle of view, perfect for general photography. The lens focuses as close as 1 meter, which is pretty par for the course when it comes to rangefinders. I was impressed by the sharpness of the lens, though I did pretty much only shoot in the middle of the aperture range.

One cool little detail about the GW690III is that it keeps track of its mileage! On the bottom plate there is a little counter that keeps track of how many shots the camera has taken. If you're buying one of these Fujis used, the counter gives you an idea of how much use and abuse the camera's been through.
Once again, I am impressed with the image quality of this 6x9 monster. It sucks that you only get eight shots per roll, but each frame is packed with incredible detail. The negatives are so big, that even just the contact prints are big enough to display and frame. I loved trying this camera out, and am thankful to Tom for trusting me with his new toy. We had a lot of fun at the bars in Galesburg drinking drafts and talking about photography. Below are a few photos I took on that night, as well as a couple of shots taken the next morning. The flash was a Vivitar 283, and the film was Ilford HP5.


Tuesday, November 29, 2022
Spotlight: Canon A35F

Released in 1978, the Canon A35F is a fun little auto-exposure rangefinder camera, and one of the first Canon cameras to feature built-in flash. I bought mine as part of a huge lot of cameras from an auction, and decided to test it out before selling it.
The A35F comes equipped with a fairly fast and decently sharp 40mm f/2.8 lens. 40mm is my personal favorite focal length, providing a standard, if ever-so-slightly wide field of view that I find to be extremely versatile. At f/2.8, the A35F can give you some nice shallow depth of field -- not that you have much control over the aperture of the lens, since the camera is entirely automatic.
 |
| The viewfinder! |
Based on the amount of light in the scene, the camera automatically selects a shutter speed and aperture combination to best expose the film, which can be rated anywhere between 25 and 400 ISO. Shutter speeds range from 1/60 to 1/320, while apertures span from f/2.8 to f/20. With your eye to the finder, a little needle points to the aperture the camera will use, depending on the intensity of the light. If there is not enough light for the camera to make an exposure, the shutter will refuse to fire. There is no option for long exposures with the A35F. Instead, the pop-up flash must be utilized. The flash is popped up manually via a little switch on the back of the camera. Once up, the flash turns on and begins to charge, which takes around 7 seconds or so. A little orange light turns on when the flash is ready to go. The camera then automatically selects the correct aperture for the flash to fire at based on the distance at which the lens is currently focused. All my flash photos were nicely exposed!

Focusing is manual, via a rangefinder system. The rangefinder patch in the viewfinder is nice and bright, which made focusing easy, even in dimly lit interiors. The lens can focus as close as 0.8 meters (2.62 feet), which is pretty good for a point and shoot! Film loading, advancing, and rewinding are all done manually. The rewind crank is nicely designed, featuring a little indicator to show if your film is properly advancing out of the canister.
Overall, the A35F is an enjoyable camera to use for casual snapshots. The only annoying thing about it is that it takes those old 1.35 volt mercury cells, which are not available anymore. Instead, I used an Exell 1.35-Volt Zinc Air Coin Cell Battery, which can be bought off Amazon here. The A35F was soon replaced a year after its release by the high tech autofocusing AF35M camera (which I looked at here), so the poor A35F is rarely talked about these days. That said, if you want a fun point and shoot with manual focus control, the A35F could be the camera for you! Below are a few photos I made with the A35F at my sister-in-law's birthday party. The film was Ilford HP5+.
Thanks for looking!


Tuesday, November 22, 2022

Sunday, October 30, 2022
Spotlight: Canon Pellix

1965's Canon Pellix is a fairly standard 35mm SLR with one unique gimmick: the viewfinder doesn't black out when the shutter is fired! To manage this, The camera makes use of an ultra thin, semi-transparent pellicle mirror (hence, Pellix) that simultaneously transmits light to the film and to the finder. The mirror is fixed, so it doesn't flip up when the shutter is tripped, and you don't lose sight of your subject during the moment of exposure. The lack of mirror movement also limits vibrations during operation, which might help reduce camera shake a little bit. It's pretty weird when you've used SLR's your entire life, and you're used to the momentary blackout and mirror slap. At first it feels like the camera is broken!
There are a few drawbacks to the pellicle mirror system. Since light entering the camera is effectively split by the mirror, the finder is a bit darker than with a typical SLR. Focusing can be a little difficult in lower light, but it's not horrible with a fast prime lens. I can't imagine using this camera with zooms, though. The mirror also causes less light to be transmitted to the film, resulting in half a stop of light loss, which you need to compensate for if you're using an external meter. I totally forgot to do this, so some of my negatives came out looking a little thin. The mirror is also very fragile since it's so thin, and nearly impossible to clean. If it gets dirty, it can conceivably affect image quality, since it's always between the lens and the film. I bought my Pellix for super cheap because it had a dirty mirror. Image quality still seemed fine, but I was using very wide apertures for most of my shots. Dust and grime on the mirror might affect images when using a narrow aperture.
 |
| The gross mirror in my Pellix didn't seem to affect image quality much, if at all. |
Shooting with narrow apertures also pretty much gets rid of the pellicle mirror advantage, because the finder still gets very dark when the lens stops down. If you're shooting at f/5.6 or narrower, you may as well be using a tradition mirror. But, for shooting subjects at wide apertures, the Pellix is a fun, gimmicky camera.

Aside from the mirror, the Pellix is a typical SLR camera, with all the basic features you could expect to find on a mechanical camera of the era. There's a standard range of shutter speeds (1-1/1000 plus B), a match-needle exposure meter, and a self-timer/depth of field preview switch. The finder and focusing screen are fixed. The Pellix does feature Canon's QL (quick load) system, which makes loading film extremely simple.
Overall I would not recommend the Pellix to anyone except for collectors or geeks like myself. The finder is just a bit too dark. Pellix finders are also prone to de-silvering, which adds to composing and focusing woes. I had to buy and return three Pellix cameras before I found one that didn't cap at speeds above 1/125th of a second, so their shutters don't seem very dependable. All that said, I still enjoyed using the Pellix, if only for the pellicle mirror novelty. Below are some photos I made with the Pellix using a 50mm f/1.8 Canon lens and Arista EDU 400 film.
Happy Halloween!
Happy Halloween!


Tuesday, October 18, 2022
Beetle Boy

I made this pinhole photo of my Beetle as an example for my Evanston Art Center darkroom class last weekend. I'm a fan of how it turned out!
Subscribe to:
Posts (Atom)